
Mount Barney
The Mount Barney Massif has ten named peaks. This trip attempted to complete six of them in a day. Robert Rankin who wrote Secrets Of The Scenic Rim is thought to have completed six of them in a single day.
The ten peaks are -
- Toms Tum
- Isolated Peak (North East Rock)
- Leaning Peak
- North Pinnacle
- West Peak (the highest at 1359m)
- East Peak (almost as high at 1353m)
- Bippoh (Midget) Peak
- Barrabool
- Burrajum Peak
- Gwyalla Peak
This trip was complicated by Leaning Peak. It requires a 25m abseil to descend from it to the South which is where the rest of the peaks are located. There are two practical starting points - Yellow Pinch Car Park to the SE and Lower Portals Car Park to the NE. Both are close to the 250m contour and both are about 5-6km from the closest of the peaks.
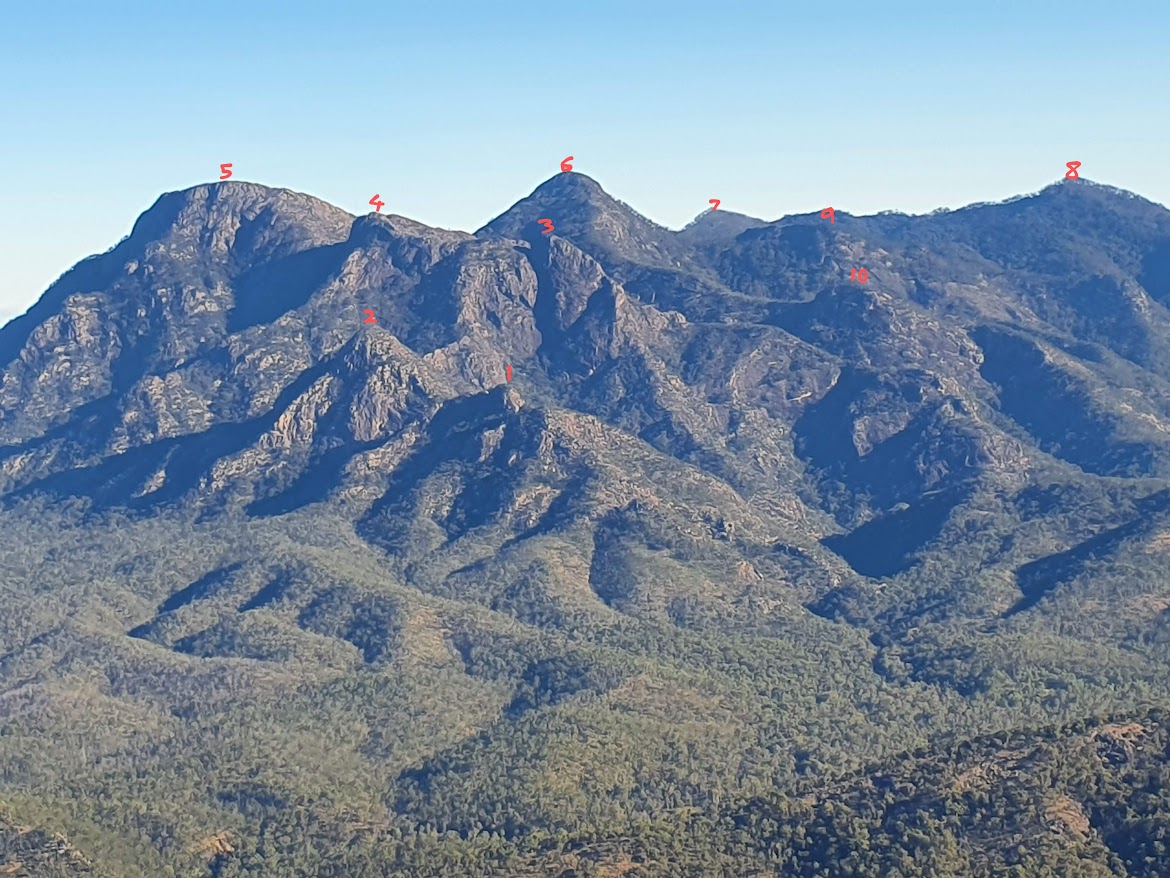
Overview
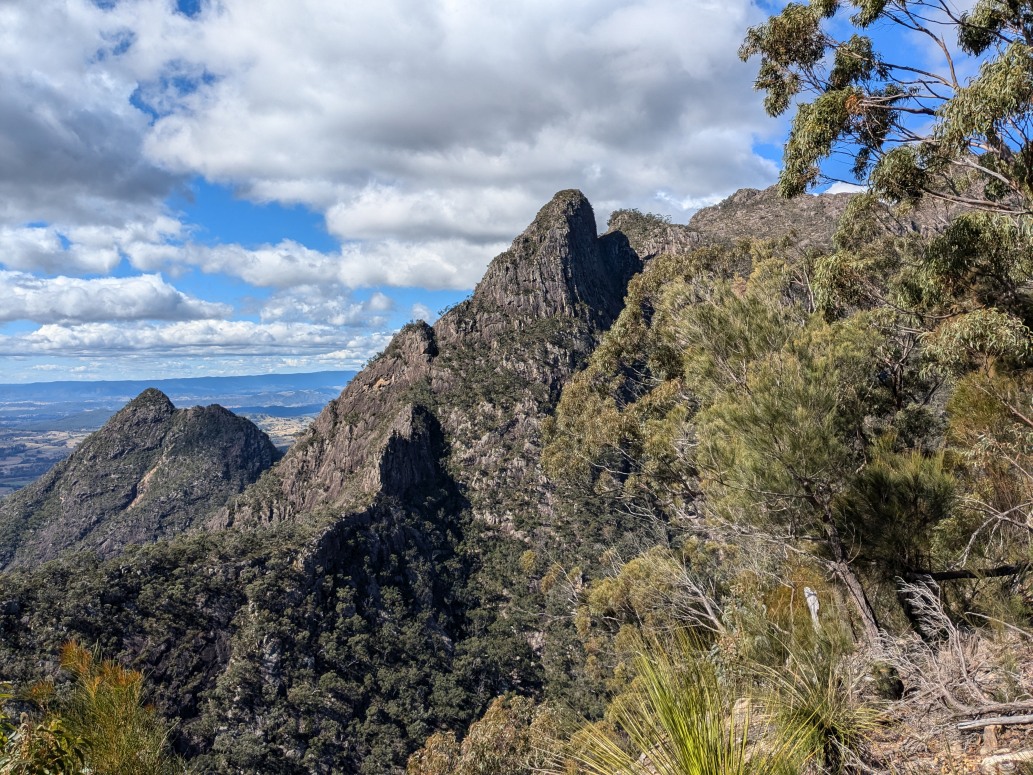
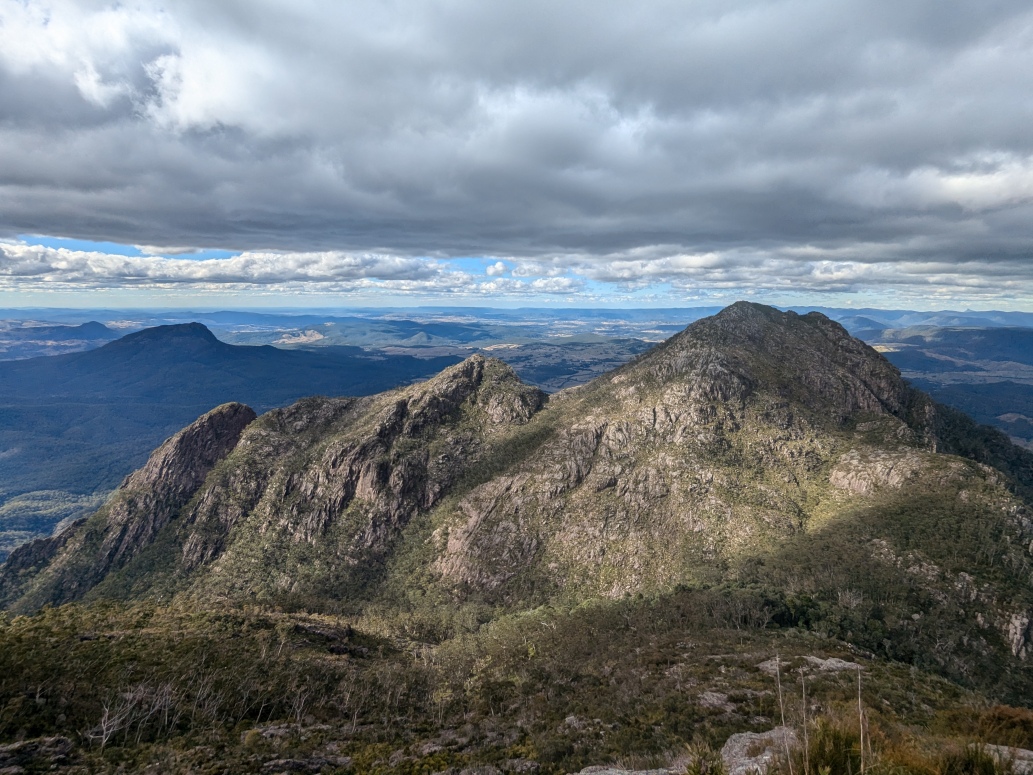
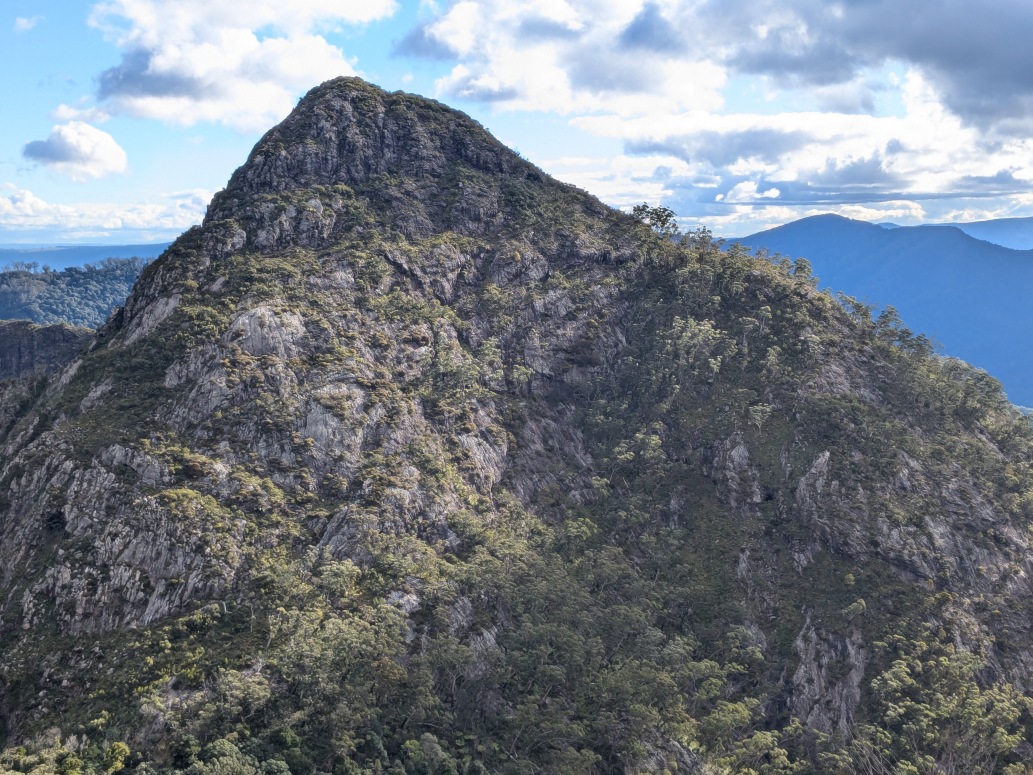
The peaks are best viewed from the North. They are mostly steep and slabby. #3 is Leaning Peak - it’s a steep climb from the North and an abseil off the South side. #5 & #6 and East & West Peaks.
Decisions and Unknowns
Choosing a route - clockwise or anti-clockwise.
Ascending Leaning Peak is an ordeal in itself - there are two ascent options both are involved exposed scrambing. The planned route was to ascend Short Leaning Peak track and descend some of the Long Leaning Peak track. Then find a way into Barney Gorge, cross it and ascend Bippoh Peak.
Need to find a suitable weather window - no rain or low cloud and preferably little wind. Ideally with longer daylight, but not excessive temperatures. There is reliable water at Rum Jungle and also in Barney Gorge Creek, but little on the ridges or saddles elsewhere.
Eagles Ridge is scrambly with tricky route finding and some exposure.
Isolated Peak is the tricky part of Eagles Ridge
West Peak has a hard chimney climb on the West side near the top.
Rock hopping Barney Creek is slow - the alternative is the Cleared Ridge Track which is 2-3 times as long, but faster.
There’s no known route off Long Leaning Ridge track into Barney Gorge.
There’s no known route out of Barney Gorge up to Bippoh Peak.
Route
Aerial view of the full route. It starts in the NE corner and proceeds anti-clockwise. Note that at Leaning Peak the track reverses, and only towards the end of the trip does it return to within 100 horizontal meters (& 50 vertical meters) of Leaning Peak.
Some of the less detailed route is unknown - it’ll be whatever seems to work on the day.

This route is 20-24km. Ascent is unknown, but probably 2200-3200m.
The 3D Peak Viewer helped to establish an order to the peaks.
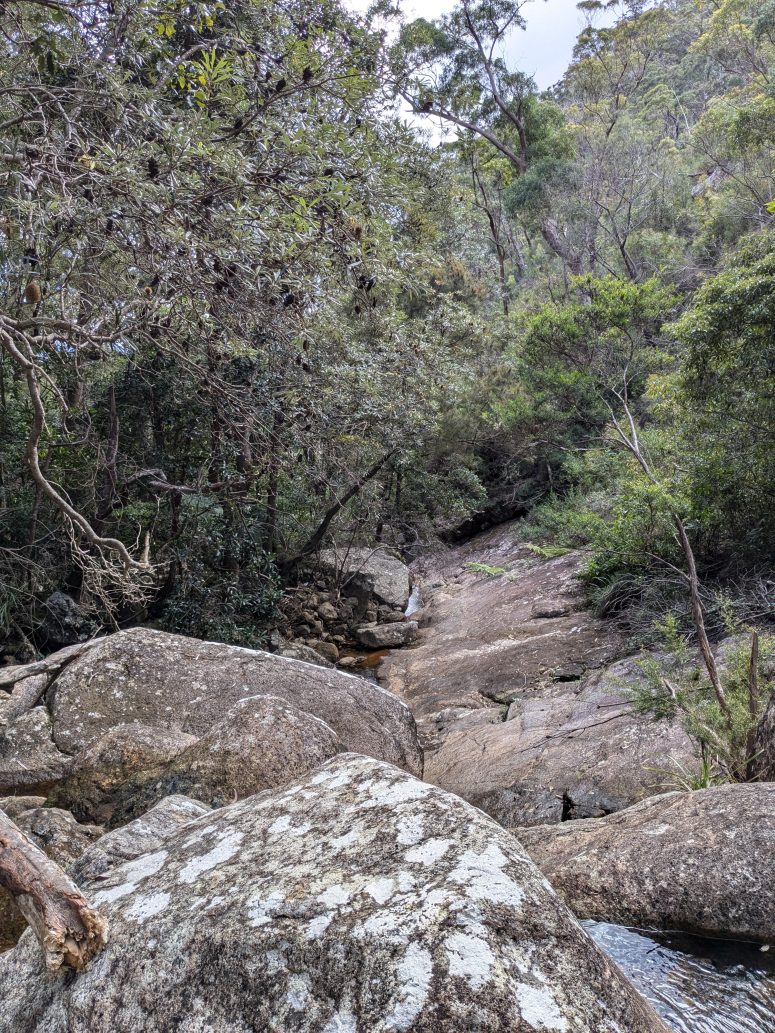
After much route contemplation the plan was to leave Lower Portals Car Park an hour before dawn. Then trot 5km West to Mount Barney Creek and follow it upstream for 1km, rock hopping for much of it to get to the Short Leaning Peak track.
Walk In
Parking at Lower Portals at 5:30AM, it was a chilly 4km rough walk and occasional trot to the creek over a few dry watercourses. Then keeping dry feet over the flowing Mount Barney Creek it was up more steeply to the ridge. The saddle looked over the creek with the track continuing up the ridge. My plan had been to rockhop the 900m up the creek to get to Short Leaning Ridge - so I took the ridge track as the topo showed the track diverged in another 30m. After 50m there was little sign of any side track and it was only heading higher. This was mistake #1 - a very minor 50m detour . So I returned to the saddle and took the kinda track down the 30m into the creek. This was mistake #2 - a route planning error. The creek turned out to be a lot wider than the recent crossing with thickish vegetation on both sides - it took a fair bit of bashing to do that 900m, although my feet remained dry.
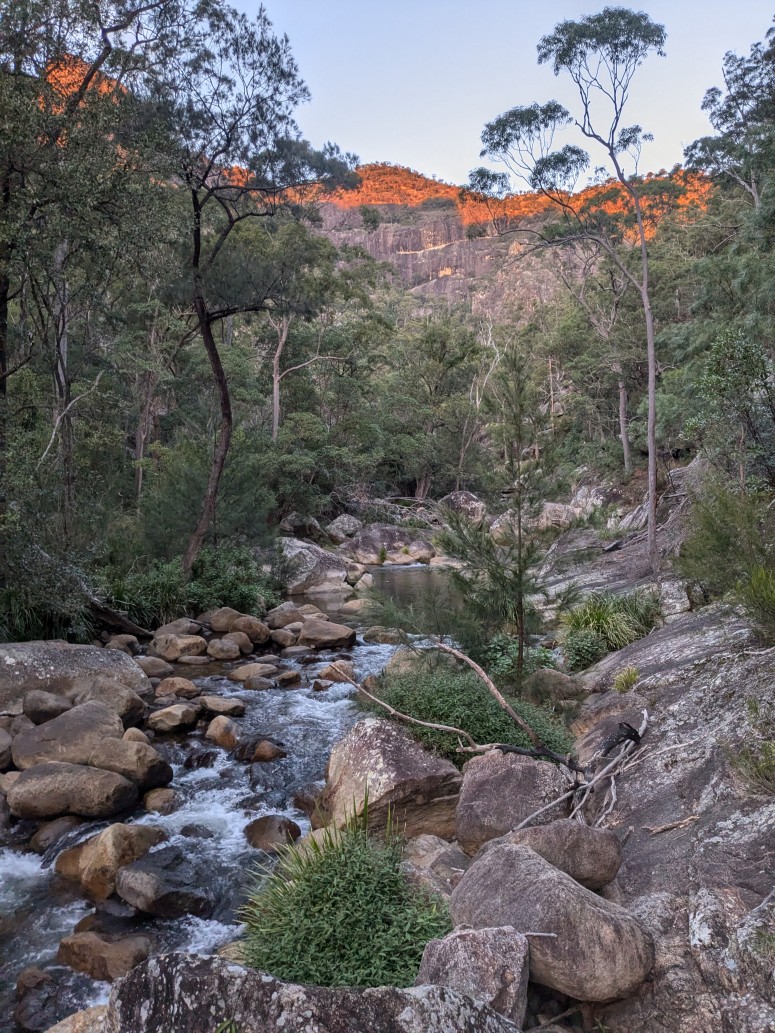
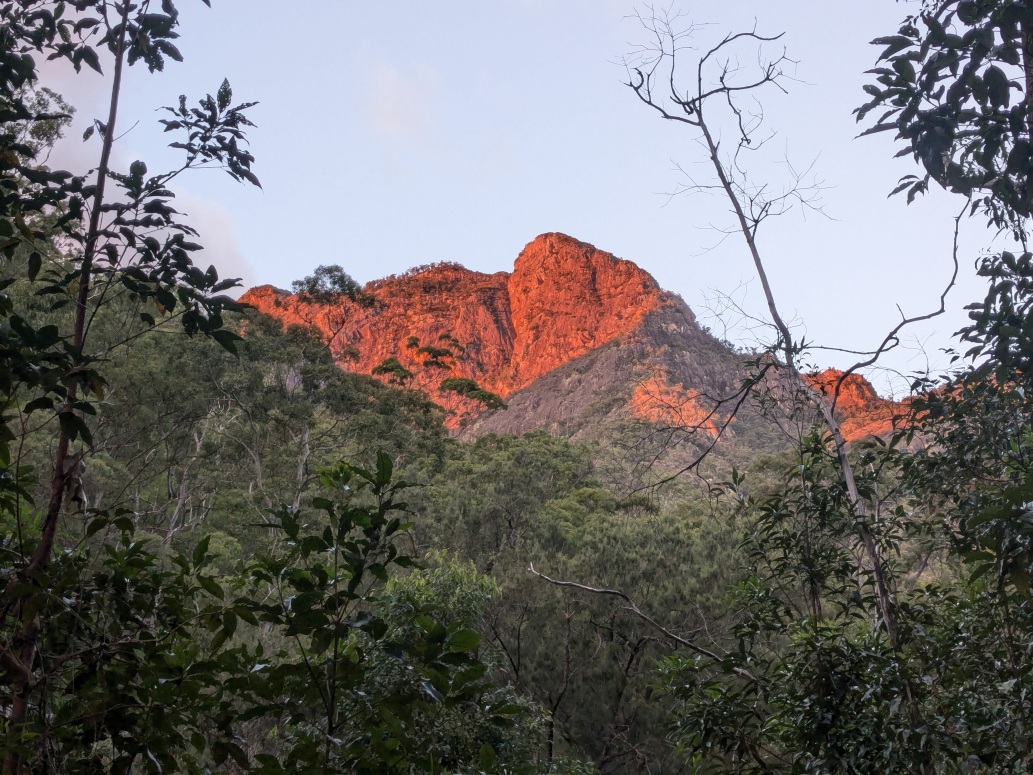
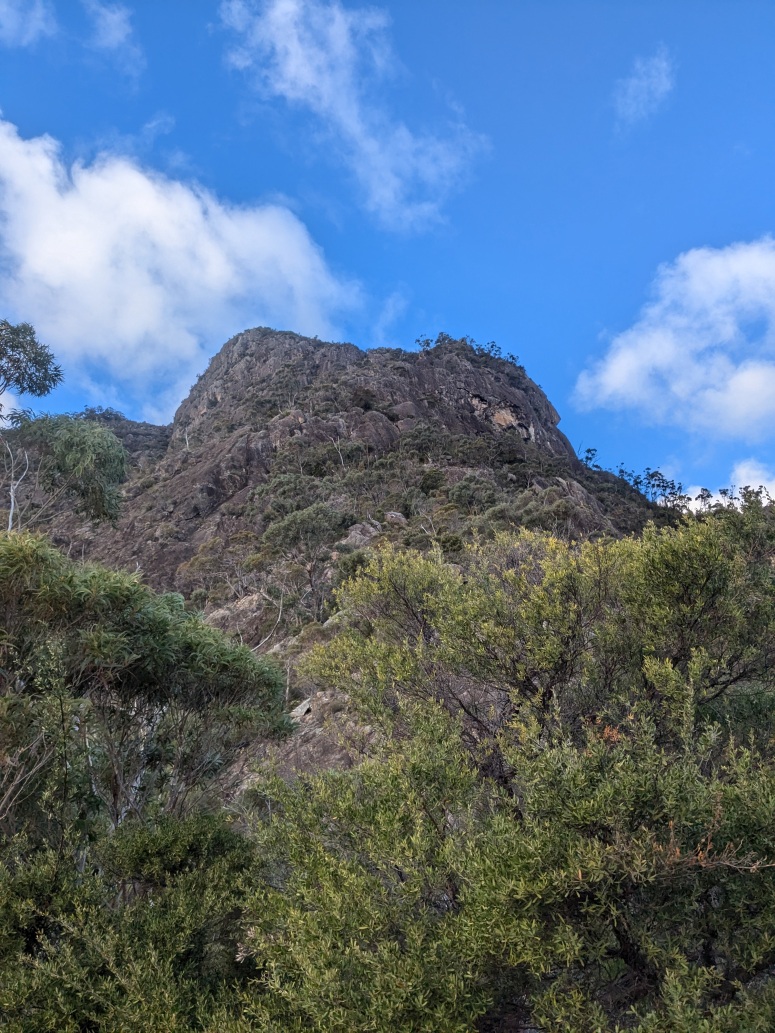
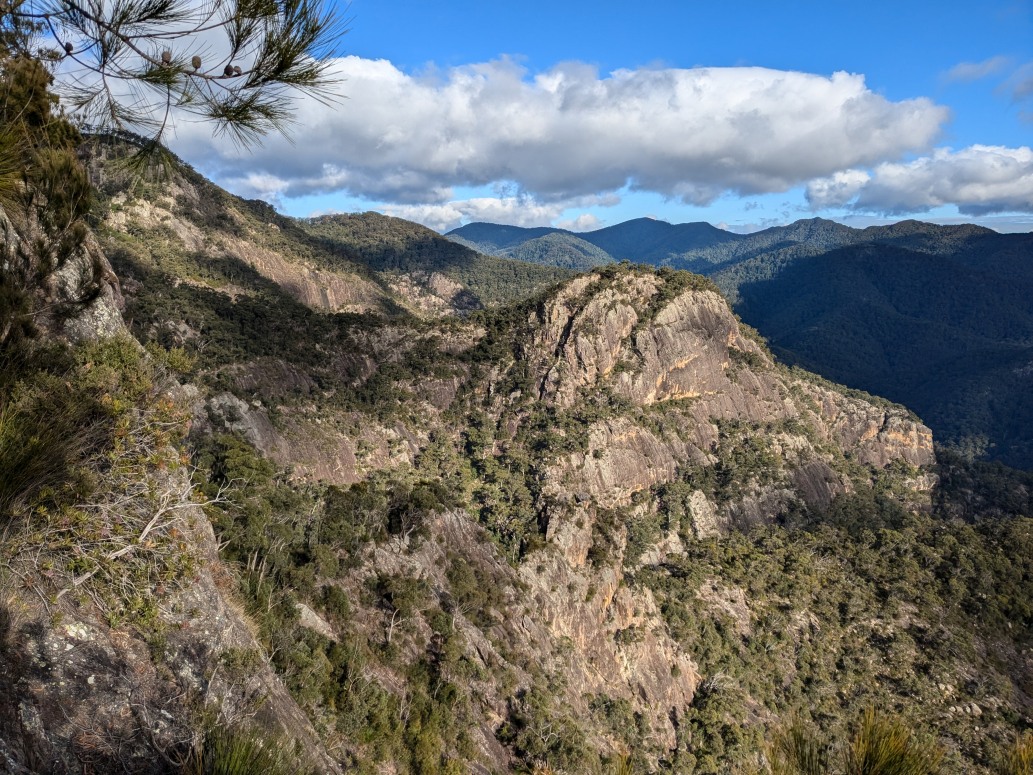
However, the upside of the creek bash was a clear view of Leaning Peak at sunrise… and also the intervening terrain.
Short Leaning Leaning Ridge to Leaning Peak
Having crossed to the South side of Mt Barney Creek I was well placed to follow the tracked marked on the topo up to Short Leaning Ridge. The gully appeared, so I took it, it got slabbier and a little overgrown with no track visible on the rock. The side became a little steeper and aftter 150m it was clear that the track wasn’t there. The topo had the track leaving the creek around here, so I ascended the steep slabs with only minor issues at first, then scrambles, then a short non-exposed climb to get onto the ridge… and hopefully the ‘real’ track.
It was not to be. The going was all steeply up, through medium vegetation and slabs. From around the 800m contour some of the slabs were steep enough to require care and navigation to find the less steep ones.
Eventually a small downclimb marked the notch where Long & Short Leaning Ridges meet. Or more accurately the notch is where the West facing gully gives a glimpse of how steep it is to get down to Long Learning Ridge.
After the notch is where it starts to get interesting. The initial 10m of ascent is a lot closer to vertical than 45 degrees.
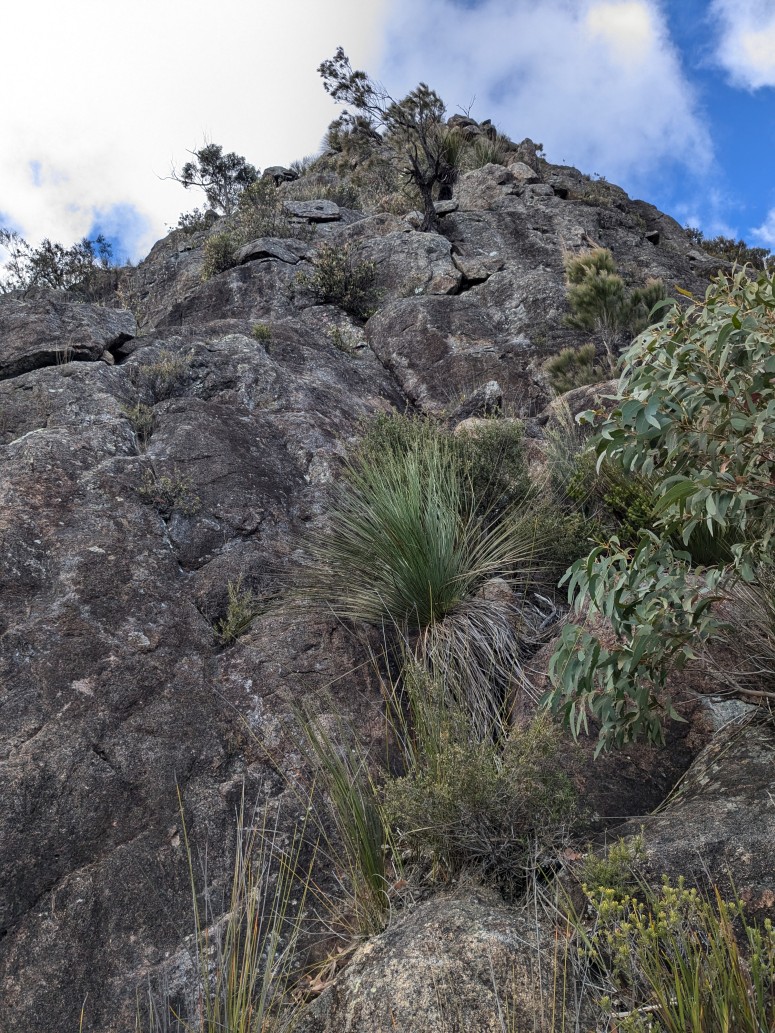
Then it gets somewhat easier in places - finding the narrow ledges that lead to these easier but still highly exposed ascents is the key. As is remembering where they are for the descent.
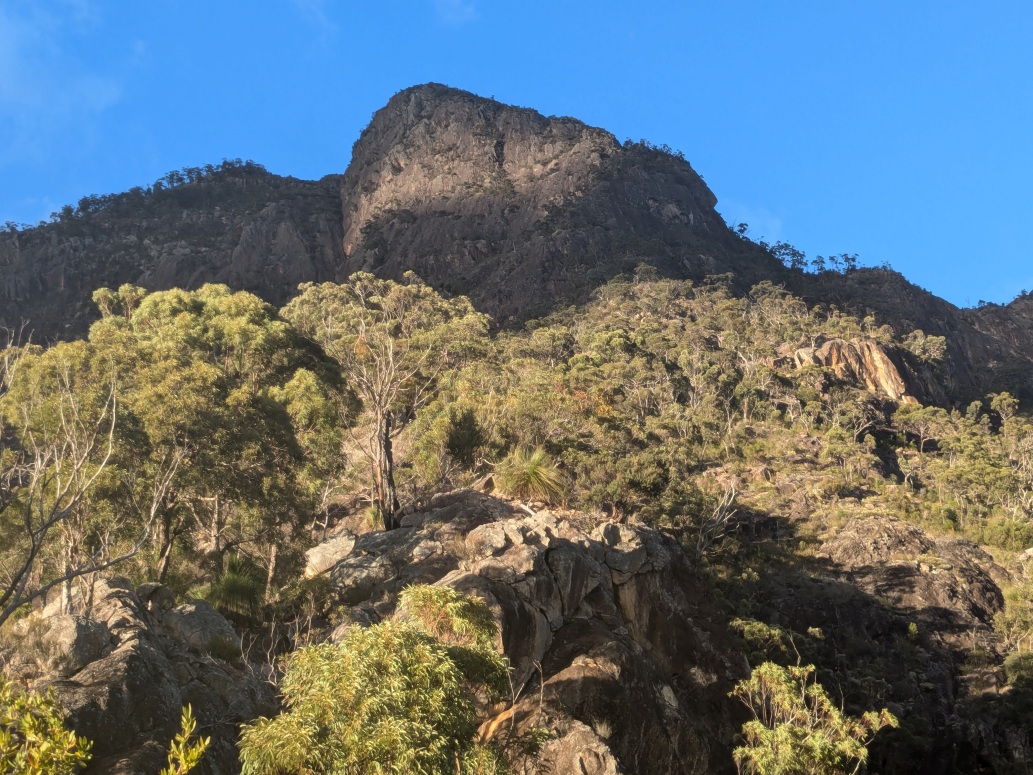
After 50m of this almost vertical route finding it levels of to a mere 45 degree ascent through boulders and lower vegetation. The summit is easily found with good views in all directions.
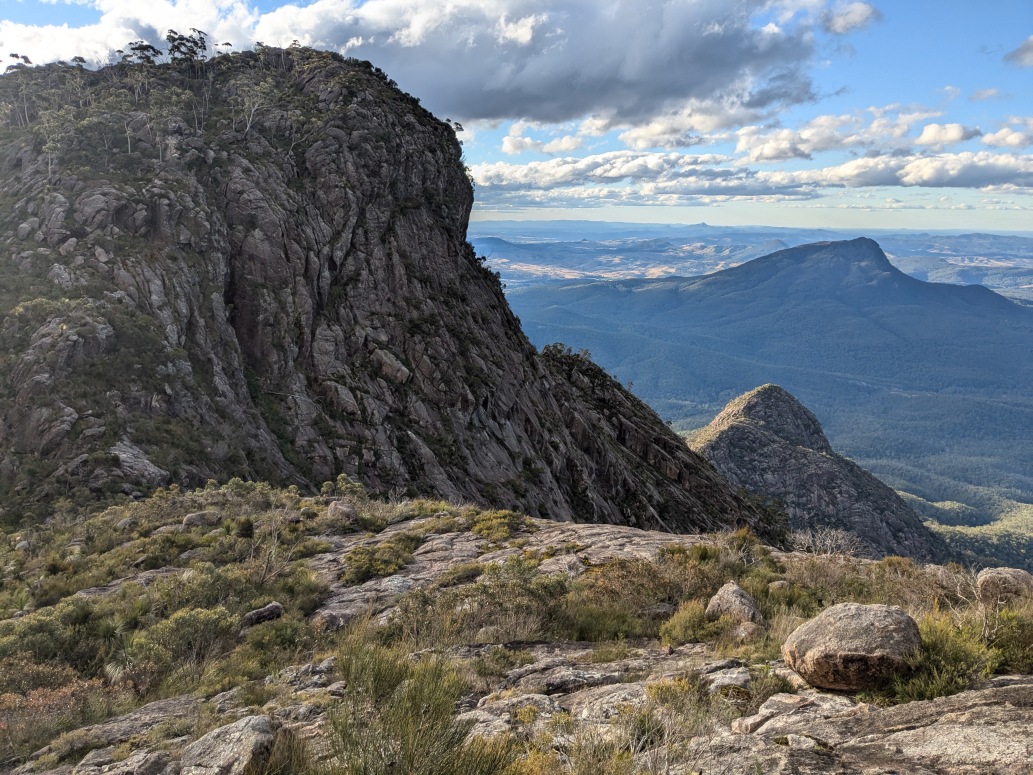
West Peak was the most visible to the South, with Rum Jungle on the saddle to the left.
On the descent from Leaning Peak Bippoh (also known as Midget Peak) and Midget Ridge is easily visible with Barney Gorge Creek inbetween. The plan was to cross that creek and attain Midget Ridge. By all accounts Leaning Peak was the crux of the Mount Barney Peaks, so I expected the rest of the trip to be relatively a bit easier.
However, looking across at those almost vertical slabs with only a little vegetation was somewhat disconcerting.
Bippoh Peak
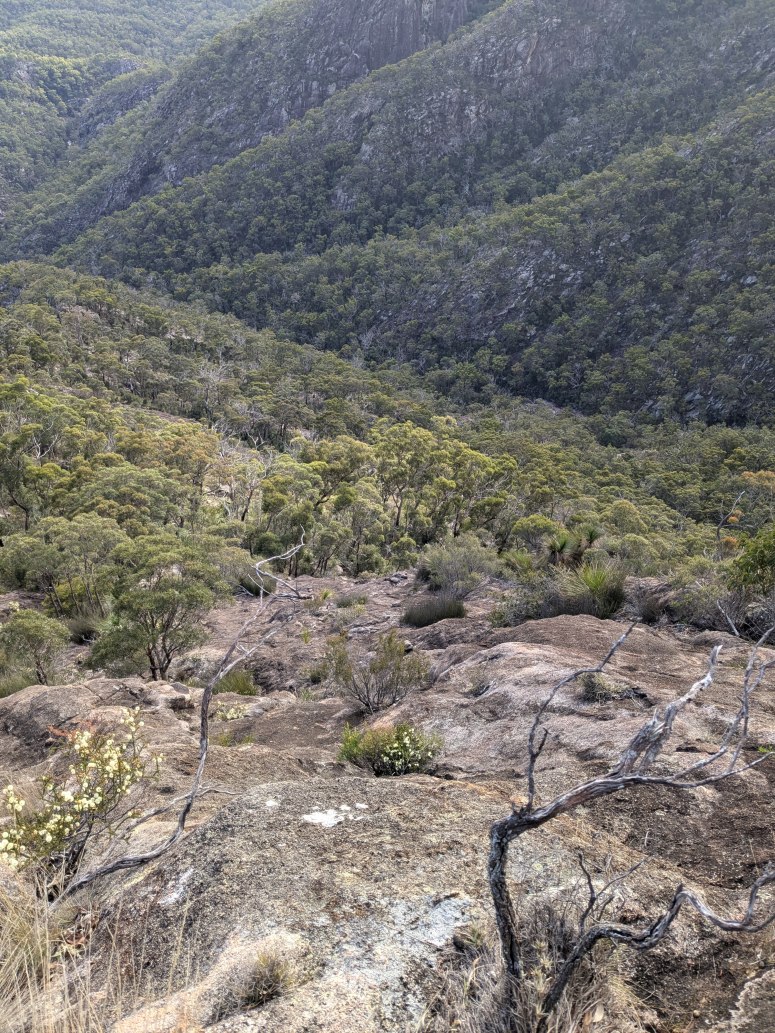
Descending from Leaning Peak back to the notch was as traumatic as the ascent. Back at the notch much of Long Leaning Ridge was visible far below, including the Razorback.
I descended the very steep slopes (not really a gully) into the Gorge. I was constantly forced Northwards by slabs towards the Long Leaning Ridge route. None of the descent was especially exposed, but care was required. On the lower slopes I encountered medium vegetation and soon it was easy to get into Barney Gorge Creek.
The going up the creek was pretty clear with only a few forays into the regrowth on the Western bank.
As I’d photographed the Midget Ridge slopes from Leaning Peak, I had a rough idea of where to leave the creek and ascend.
First attempt to leave the creek was rebuffed by thick vegetation, another by steepness, so I continued upwards on the relatively easy rocky creek. When another opening appeared in the vegetation I took it, but soon hit thick impassable horizontal dead sticks. An option was to ascend the relatively easy slabs to bypass them and then continue contours slightly up towards the saddle.
It was not to be. There was no easy way off the slab to get back to the vegetated layer. So onwards and upwards it was. The slabs don’t look too steep when you’re up close and looking up at them. That feeling stops when you actually have to climb them, and there’s a few meters of slabs between you and an apparent dropoff below you. So I spent almost an hour navigating those slabs, going is circles, checking that I could backtrack if need be, investigating ledges. This was big mistake #3.
I did get up those slabs, but I wouldn’t do it again. I was far too high up towards West Peak instead of Bippoh, so it was a painful descent of Midget Ridge to the saddle, then an ascent up Bippoh, before retracing my steps. There was no track except for the last 50m at Bippoh Peak.
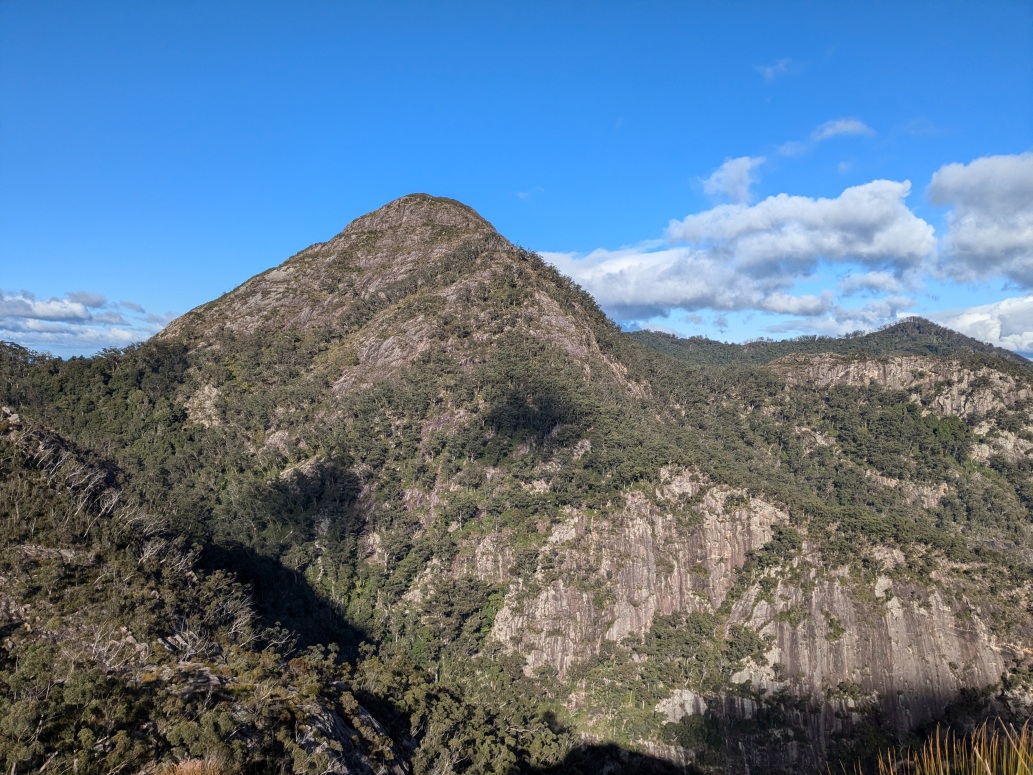
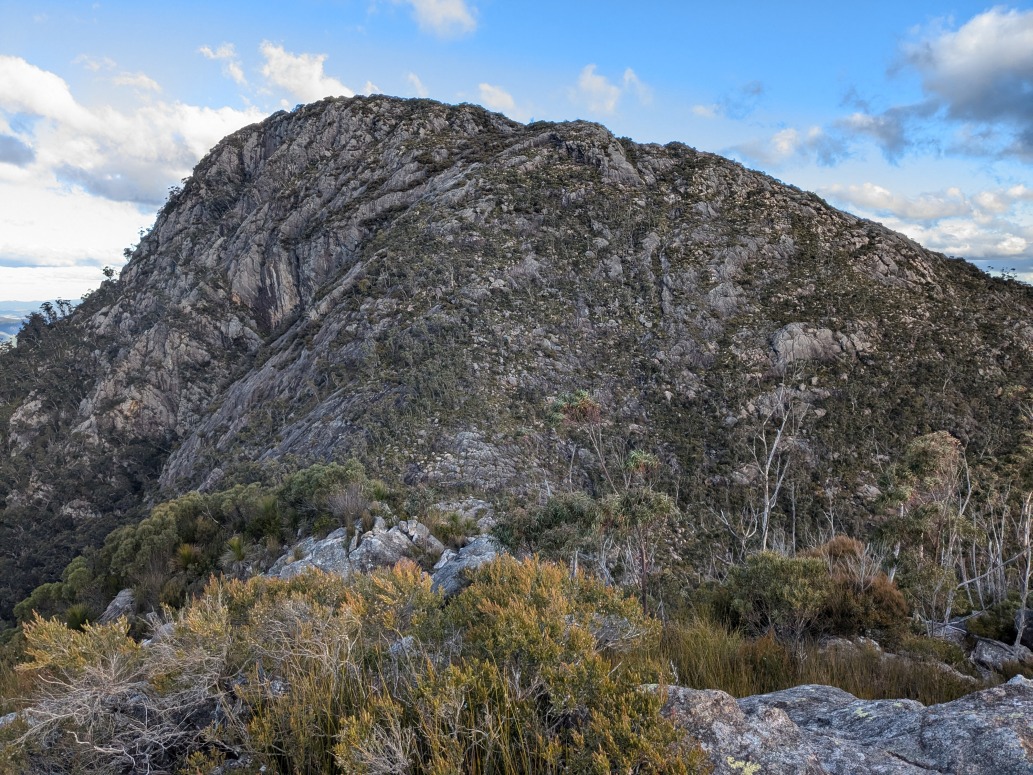
As I ascended West Peak, Bippoh is the little prominence along the ridge.
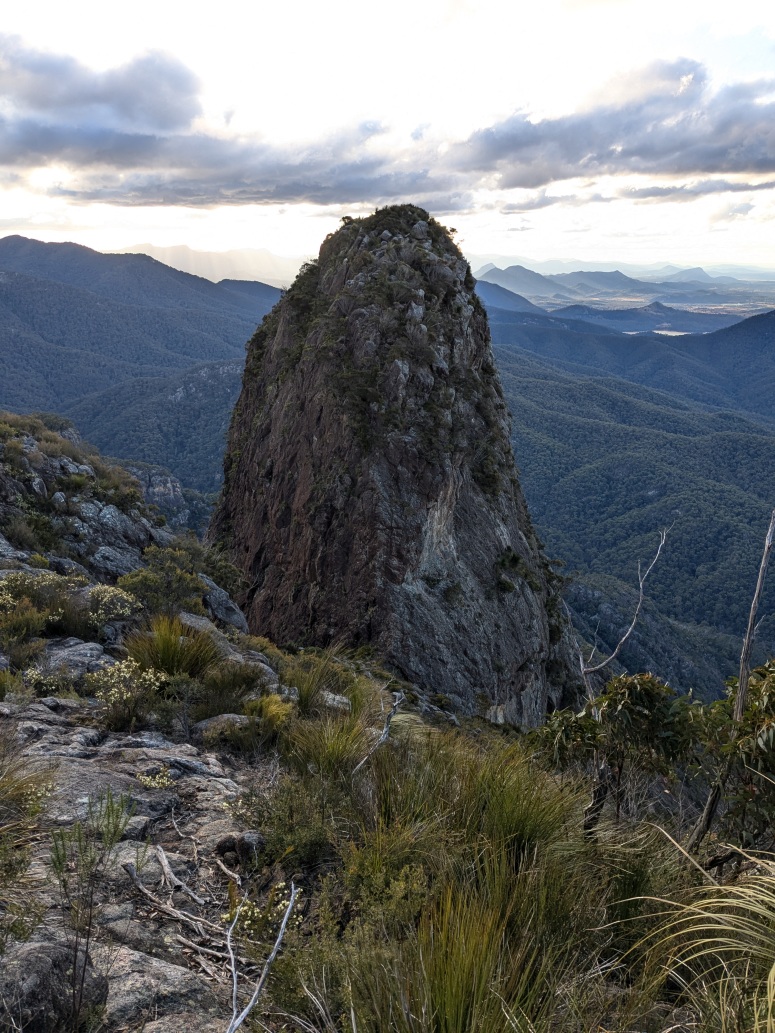
There were great views of the Western slopes of Leaning Peak that showed the notch at extreme left, and the slopes I descended to get into the gorge.
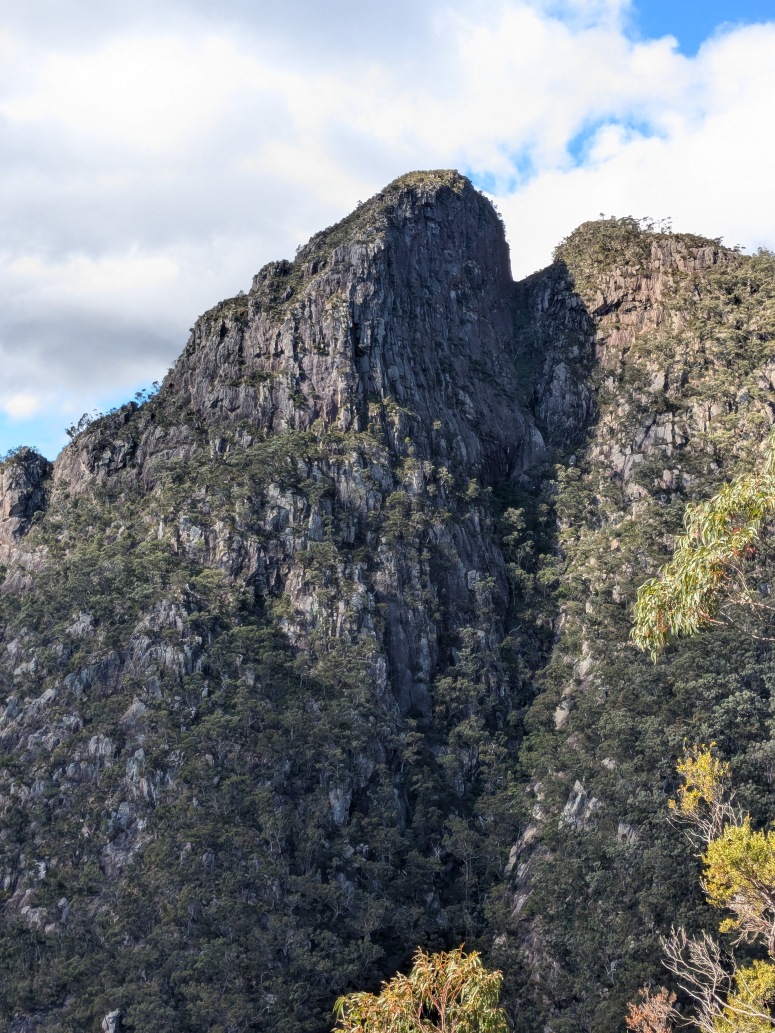
Views of Leaning Peak and Long Leaning Ridge (directly below the notch with the shadow of the Razorback in midground) and Isolated Peak at the left. Short Leaning Ridge is the 45 degree slope above Long Leaning Ridge.
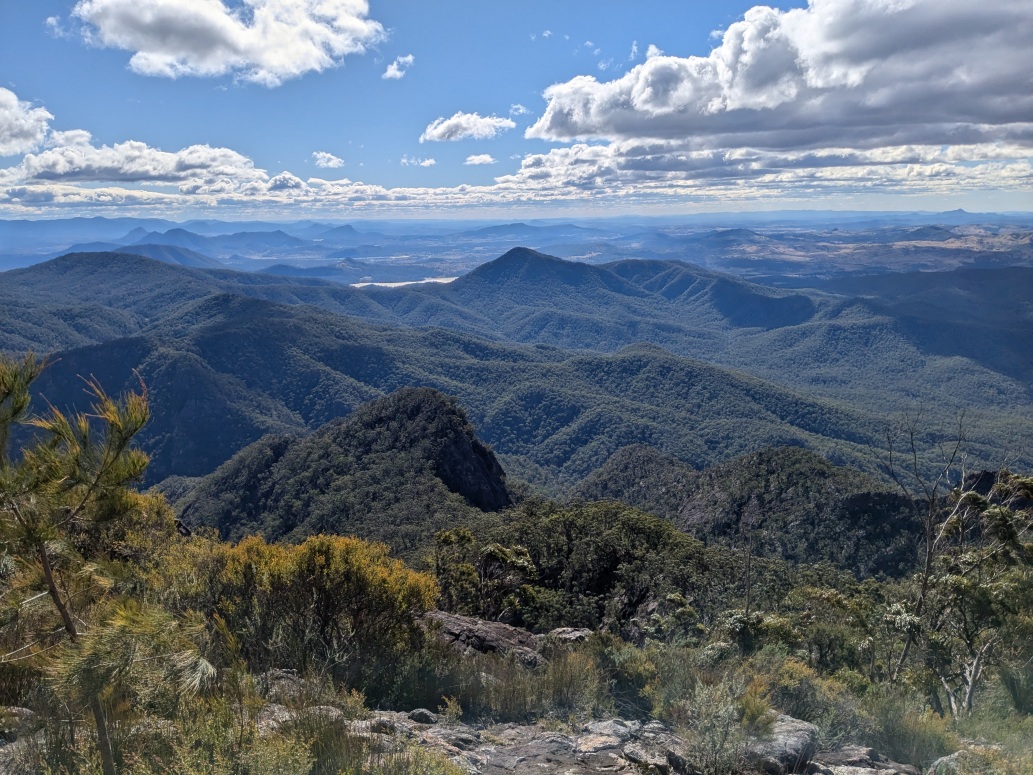
The ascent to West Peak was arduous although uneventful. From the top at 1359m there are 360° views. East Peak was the next destination the North Peak (to the left).
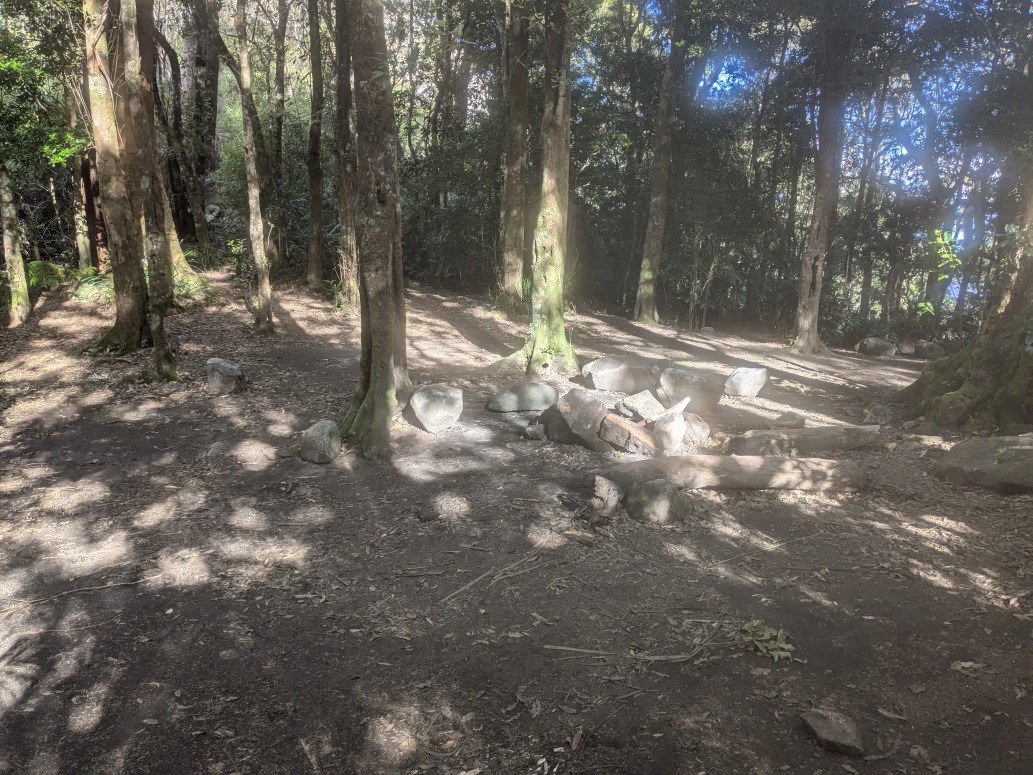
To get down to the saddle between them, I backed off the summit a little and then headed North, there was a faint track beaten into the vegetation in places, but it was easy to lose on the intervening slabs. I surprised a swamp wallaby who disappeared over the terrain at about 10 times the speed I could. After losing and then finding the track I got down to Rum Jungle. It’s a cleared camping spot with running water. There’s a gentle 100m track down to the creek where I refilled.
At this point my watch which started the day with 6 days of charge remaining, died with 1% battery. I had been relying on it to tell me if I was left or right of the (alleged) topo track. So I started the Strava App to log the remainder of the trip.
At the edge of Rum Jungle I came across a triangluar marker indicating the track to the North Ridge - it was the only man-made marker I was all day.
And then I crossed the source of the creek. It was a little stagnant, so I wasn’t too upset about my detour down to the flowing section. The track was OK for a while before disappearing or braiding across slabs. However, without difficulty the top of East Peak was reached.
With excellent views to Mount Ernest in the foregound and Mount Lindesay on the horizon.

And back to the descent I’d just finished from West Peak towards Rum Jungle.
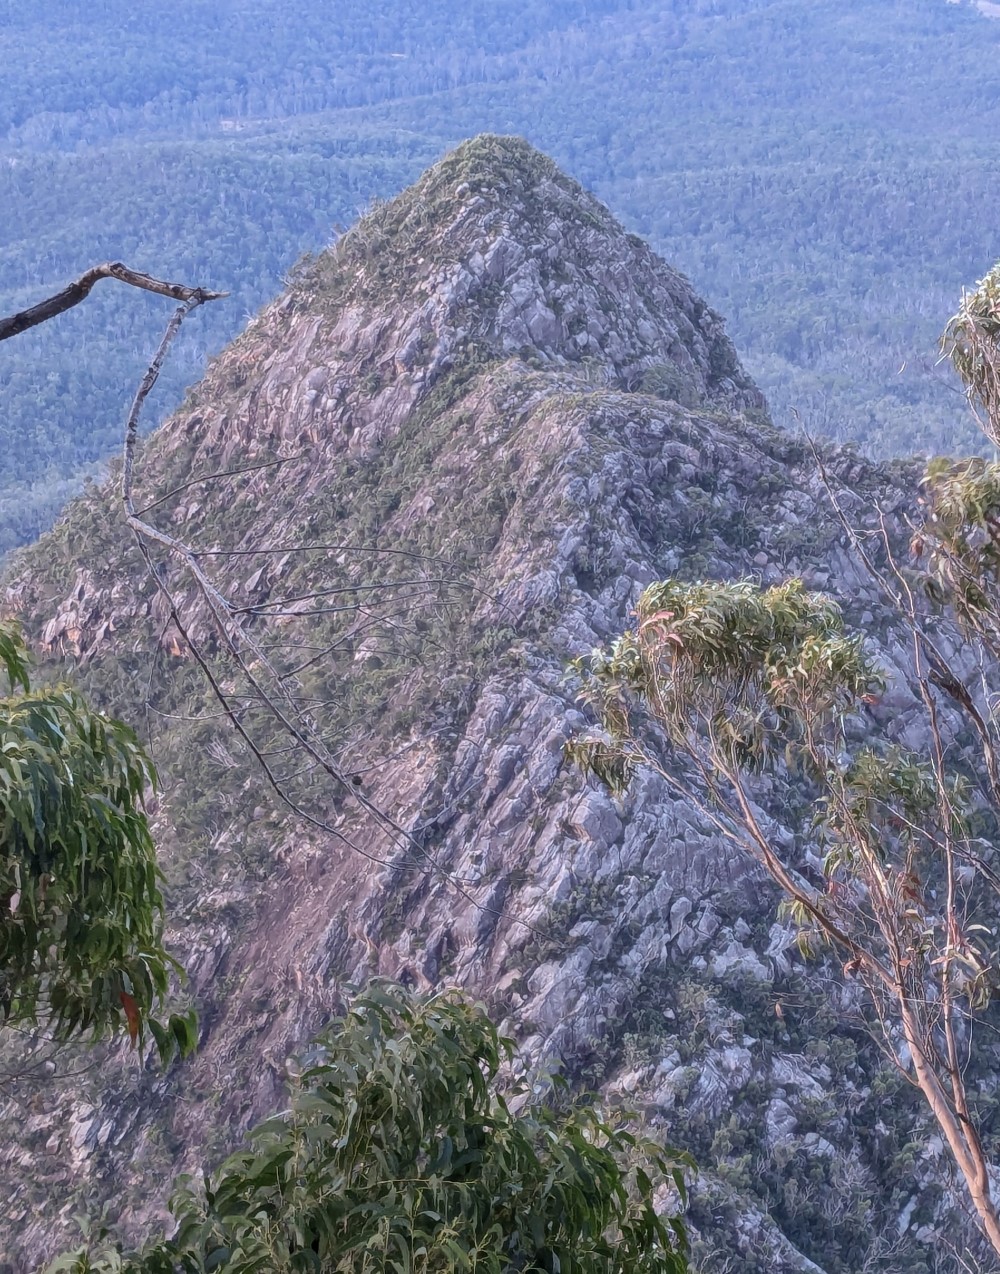
Backtracking 200m from the top of East Peak, there was a good track leading Northwards towards North Peak. It wasn’t a straightforward descent, but it wasn’t too far to the easy saddle slabs.
Looking back at East Peak and the descent I’d just finished.
The North Peak ascent and descent was a bit of a non-event - both were less than 100m with less than the usual amount of failed route finding and slabiness. And before I knew it I had passed the invisible turnoff for Isolated Peak and the impressive face of Leaning Peak felt like it was towering over me. I had always intended to visit it from this side, so there were no regrets.
Retracing only 100m I found the unreasonably steep NE slopes to commence the descent to Isolated Peak. This turned out to be the longest descent so far - from 1140m down to the saddle at 790m over a horizontal distance of just 450m.

Route finding to the 790m contour was hard due to it being mostly steep slabs. I started the descent at 4:30 - only 30 minutes from dusk.
Close to the bottom, there were at least three detours as a result of impassable drops. All were bypassed on the Eastern side. I’d been moving for 12 hours as last light approached. It was time to break out the head torch, rug up and find the way through the impossible looking slabs of Eagles Ridge to reach Isoloated Peak.
It took a while, some backtracking and a narrow slot ascent followed by a climb out of it and up a long 45° slab. From there it was mostly following the ridge and after a false summit and flatter section, hit Isolated Peak.
A half moon gave a little context to my headlamps beam, so I could see the imposing outline of Toms Tum 150m beneath me. I can’t remember much about the descent from Isolated, but the GPS track shows a few occasions where I was appartently mostly stationary for a while. Or more likely working out which direction was the least precipitous.
Then a sharp right turn close to the base of Toms Tums with more backtracking in the darkness.
Then at the expected sharp left turn Northwards I hit precipitousness in the remaining directions. The headtorch was of little help - beyond the edge of the slabs was just blackness. Til then I had been determined to get off the mountain… it was looking like getting out the emergency blanket and sleeping til daylight might be the sensible option. However, I persevered and after a few more aborted attempts, I turned the headlamp off, let my eyes adjust and the moonlight showed what the headtorch couldn’t. I went down the one I’d first tried a little further and the steepness wasn’t to extreme. Then a small climbdown and a gentle contour across the slab with only a little exposure up to the halfway point. That turned ot to be the last slab of the day.
It was a further 450m of descent before hitting the trail I’d come in on. The rest was a moderately unpleasant bash over loose rocks, through lantana and later following a dry creekbed all the way down to the trail.
The hazard reduction burn that I’d noticed on the trot in didn’t help at all - it fizzled out only a little way up the hill.
Lessons
- Stick to the ridges
- Don’t do Eagles Ridge for the first time at night
- Have a GPS log of exactly what route to take right down to the nearest 2m
- Plan the route, so that the exposed parts are done during daylight
- Long trousers, gloves, a pole, headtorch are essential
- Grippy soles are mandatory
- Leave before dawn
- An early rising full moon is preferred
- Ideally wait for a bushfire to clear the vegetation
Actual Timing
- Left car park at Lower Portals 5:30AM
- Returned 19:30 hours later
Stats
I stitched the Garmin and Strava logs together, but missed a bit in the middle. They didn’t add up, so totals are a bit off.
GPS says 21km
~3000m of ascent.
Elapsed 19:30 hours
Care
This is a route that has significant route finding challenges. The tracks shown on all the topos really do not exist - they are diagramatic only.
It has very steep and exposed sections, significant exposure, serious bush bashing, loose footings and a requirement for good free-climbing ability with potential for sub-optimal outcomes.
Plan for your timing to be significantly different than those shown.
There are some early exits and the possibility of reversing sections if anything becomes overly problematic. However, it is easy to become disoriented or fail to find an acceptable scramble to enable a retreat.
Expect to be walking in the dark.