
Western Arthurs
Overview
Western Arthurs is a mountain range in South West Tasmania that is an arduous six or seven day walk. This trip completed the range from A to K in a little over 31 hours, stopping only for 7 hours of sleep at Lake Sirona.
Route
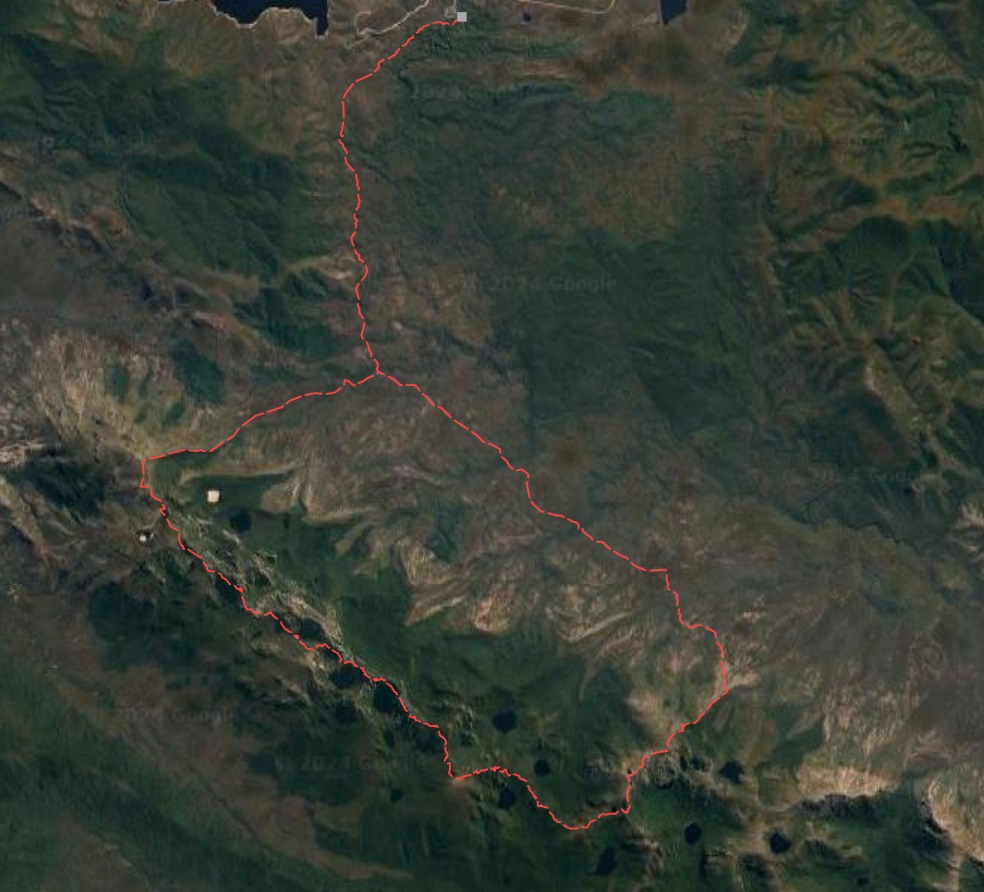
The standard route starts at the carpark next to the Huon Campground and traverses a fairly level 9km to Junction Camp the start of a big loop.
The big loop is taken anti clockwise firstly across another few km of plains, and then a 800m steep ascent up Morraine A to the base of Mt Hesperus at the 1000m contour.
It continues across the very rugged peaks for 19km rarely dipping below 850m and never higher than Mt Hesperus until Mt Scorpio at the very end.
From Mt Scorpio the route descends Morraine K to the 560m contour, before following the shortcut track to rejoin the McKay Track and head NW across the plain back to Junction Camp and thereafter back to the carpark.
Getting There
It’s 2.5 hours from Hobart, with around 40km of good gravel road. Follow signs to Huon Campground from Scotts Peak Dam Road. The walkers car park is 200m before the campground, which has a pit toilet, a sink and 5-6 level camp sites. There’s a small shelter with an intentions logbook 20m from the start of the route and nothing else but a dozen car spaces.
Day 1
After camping at the Huon Campground, I got a 4:45AM start, using a headtorch through the tight forest for 1km, until it opened out to heathland.
This was the start of the 9km slog through at least 50 bogs all between ankle and knee deep before reaching Junction Camp. It was fairly level, but venturing off the track is a non-starter - the heath is often impenetrable and besides, creating braided tracks to avoid the bogs destroys the fragile vegetation.
Crossing a few small creeks, I reached the Camp in a little under 2 hours. Considering there is very little elevation and some of it is on level boardwalks, this is a relatively slow 9km; however, going any faster is almost impossible. After a dry spell or in icy conditions, the bogs may be easy to traverse, but not for my trip.
At Junction Camp there’s a sign - left to McKay Track and right to Port Davy Track - take the right, or alternatively take the left then turn around after 100m when it all feels like you’re not heading towards Mt Hesperus.
The plains continue in a similar boggy vein for another 3km to the Port Davey Track signpost pointing right. Ignore it and keep straight ahead so it feels like you’re heading towards Mt Hesperus. There are vague signs of a steep track heading up Morraine A.
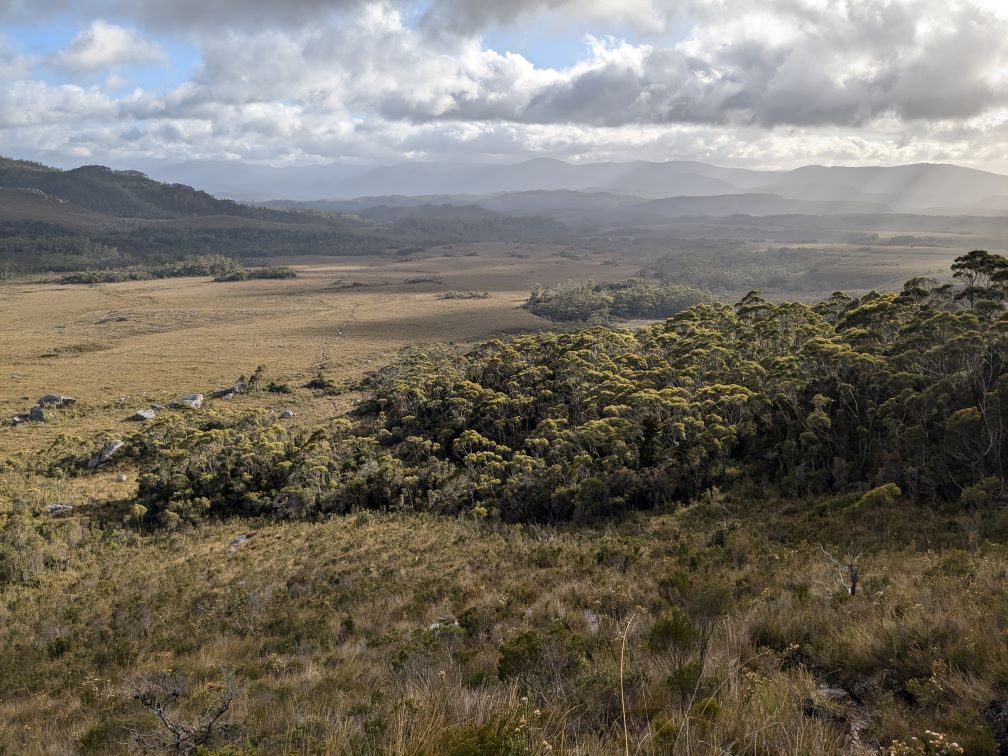
The track up is a glimpse into what much of the ridge will entail - big often slippery steps. Looking back towards Junction Camp from Morraine A the track across the plains can be seen with the campsite among the trees at the left.
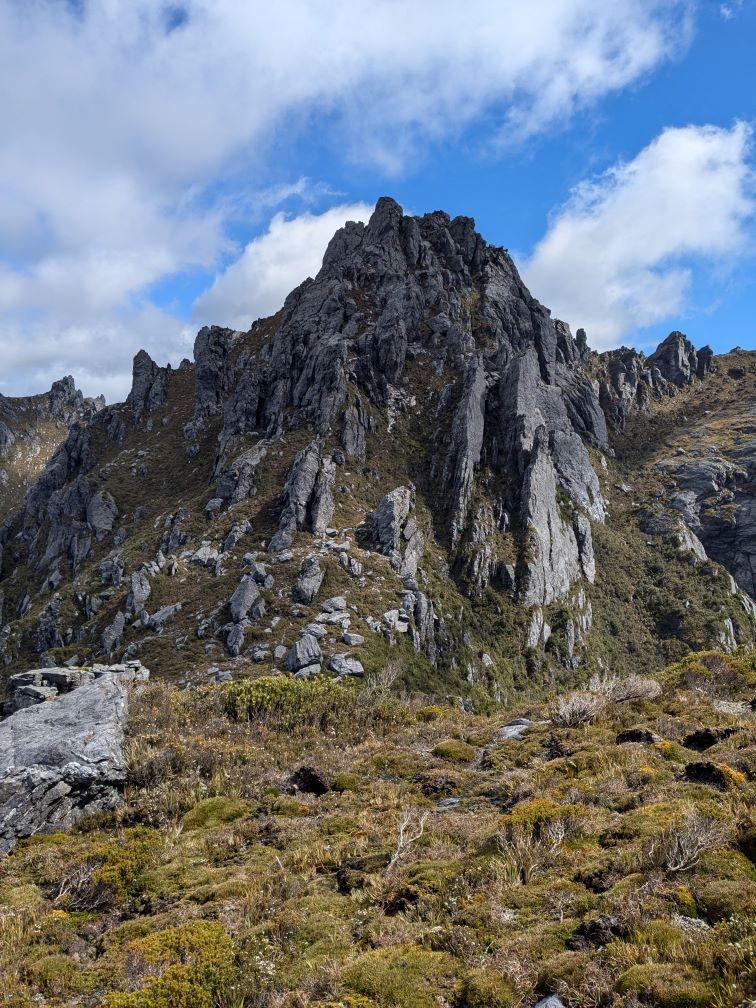
From here it is a steep 800m to get to the ridge below Mt Hesperus, which is the 2nd highest peak on the trip. Then you’ll hit some nice rock pavements laid over the years to keep walkers on track and protect the vegetion and also to prevent boggy patches.
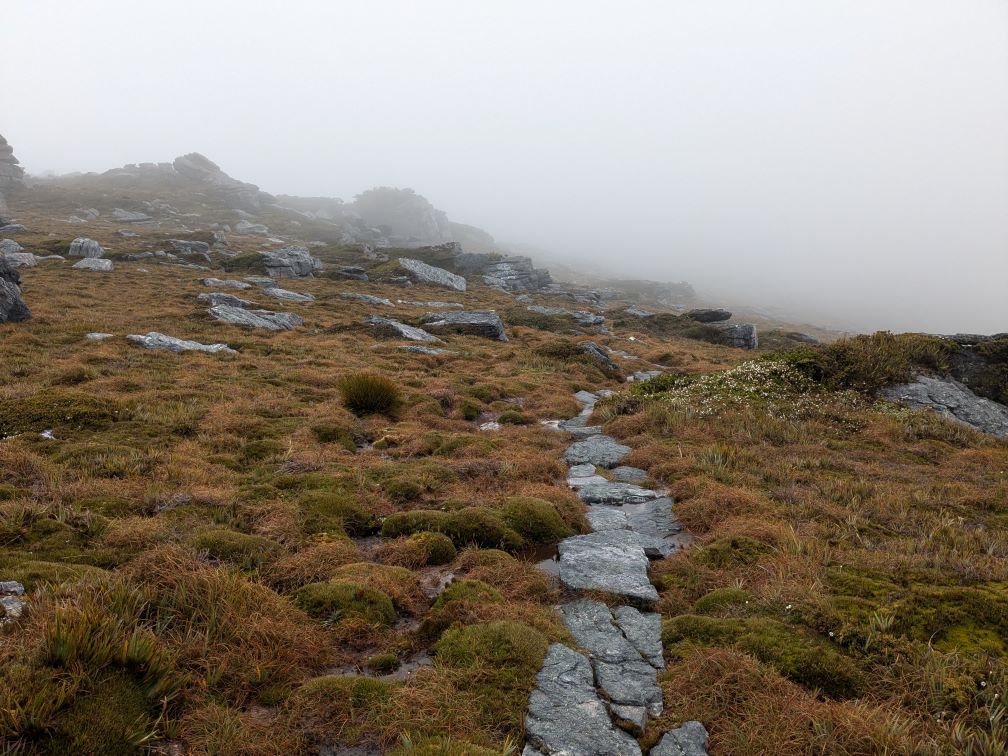
The cloud had still not cleared and a windproof was necessary to keep the chill wind at bay.
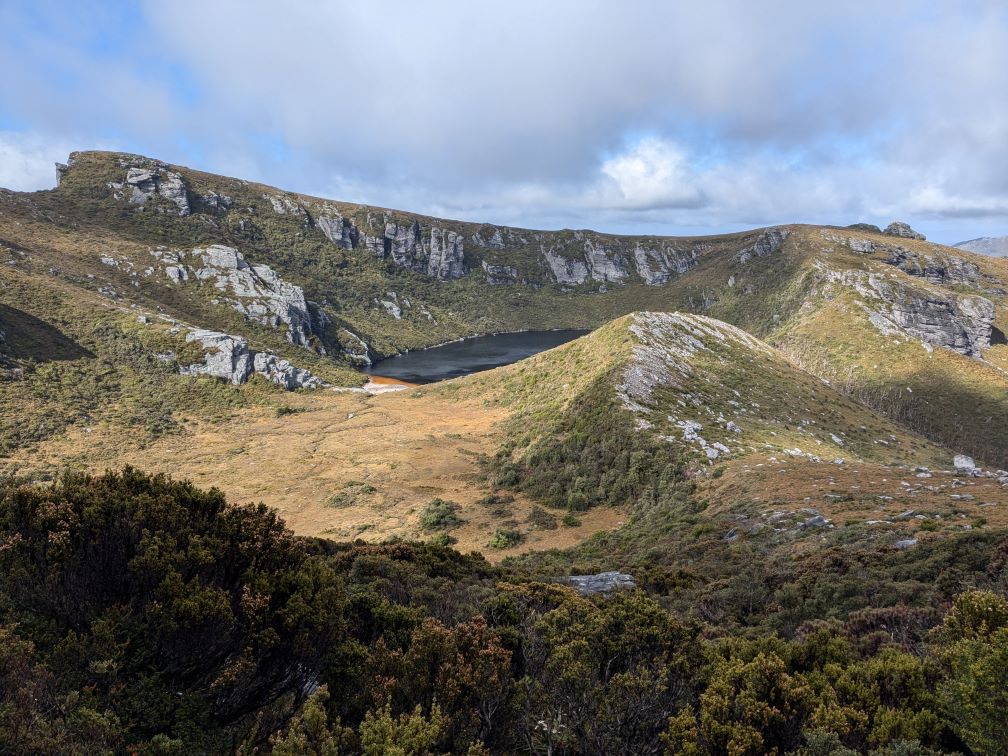
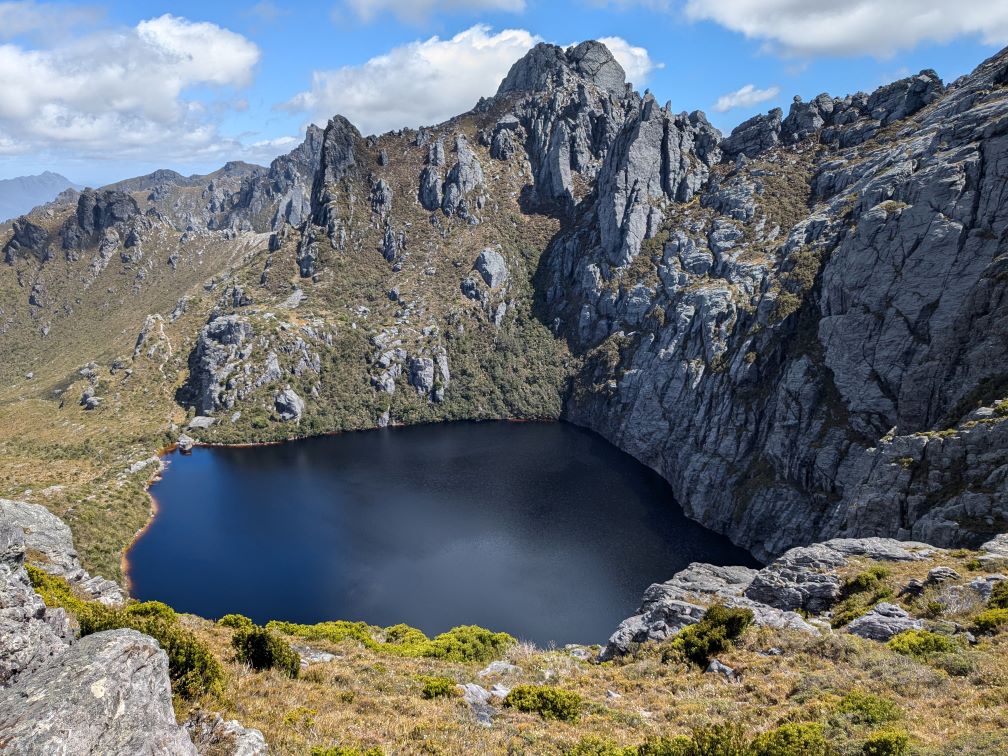
And soon after the Capella Crags the first tarn comes into view - Lake Cygnus. There’s a good path down to the campsite there, and a much less obvious path to continue along the ridge - choose carefully.
Looking back at Square Lake it was approaching 10:30 my target time to reach the Lake Oberon turnoff. The track down from Mount Hayes that skirts Procyon Peak is visible at the left. I had passed a group of three descending Mt Hayes with some difficulty, and a pair of Europeans admiring the views near Procyon.
And after an easy up and a very steep and rocky descent the Lake Oberon campsite turnoff was reached.
The camping area is in the trees at the right. Parks and Wildlife recommend that if any member of the party has struggled with the route so far, they should camp at Lake Oberon and return the way they came. They are not wrong.
The degree of difficulty increases by two or three notches very quickly. The next obstacle is Mount Pegasus - the first significant crux. Unlike most of the peaks which are skirted, the route goes pretty much over the top of Mt Pegasus. It starts with a keyhole ascent under massive boulder up a slanting boulder jammed above a rocky drop. Shortly afterwards it continues with a featureless 6m slab climb that would be marginal in wet conditions. After traversing to the North side then comes an ever narrowing ledge that culminates with a vertical slab over a 8m drop. This slab has thin holds where most would need to pack haul again.
Looking back of the descent from Mt Pegasus, the lower section of the track is just visible. The scrambles on upper sections are either in gullys or over bare rock.
The level of difficulty drops only a little for Mount Capricorn, but navigation is trickier over the steep bare slabs. Keep looking ahead for cairns and verify any track that drops significantly off the ridge.
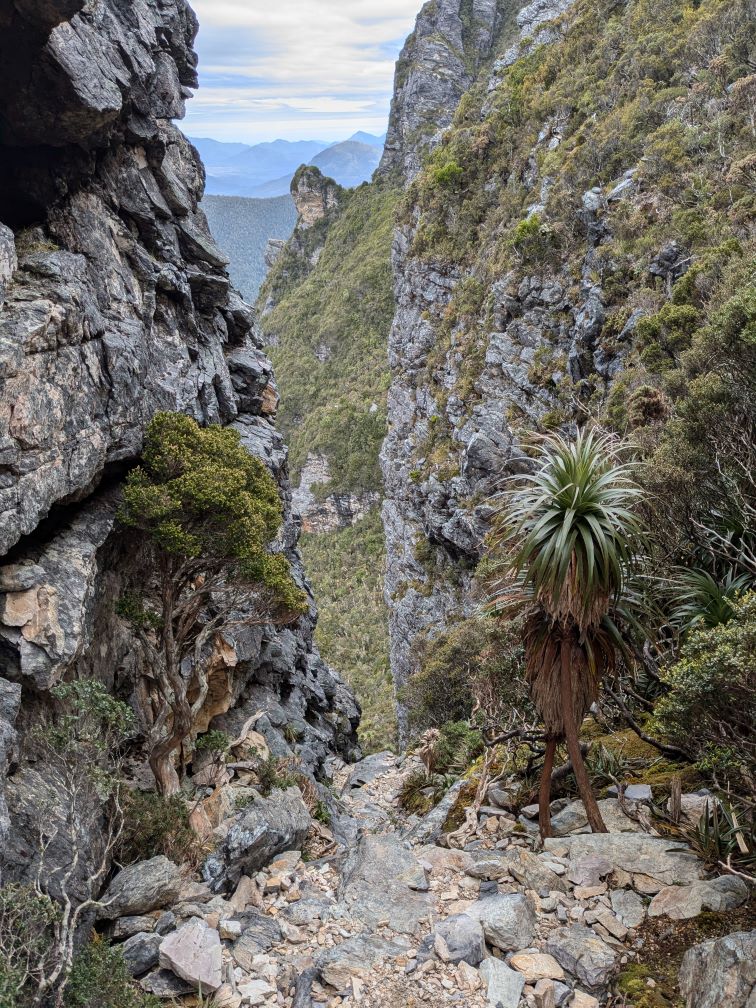
High Moor campsite is visible well before it is reached with an easy descent and ensuing ascent towards the Beggary Bumps. The Bumps have multiple hazards - steep ascents and descents, narrow ledges and of course the infamous Tilted Chasm.
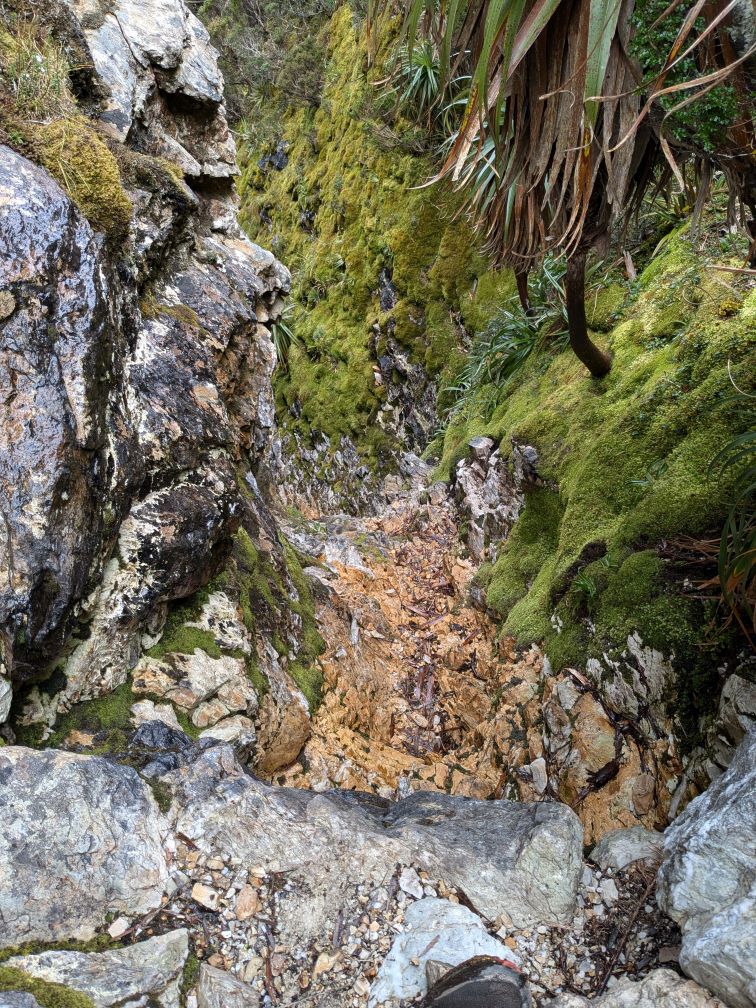
The Tilted Chasm is probably the longest and steepest and loosest descent of the whole trip. It is always damp and slippery with the risk of dislodging loose rocks. From the top it is easy to think that this is just a scree gully that it’s impossible to see the bottom of and couldn’t possibly be part of any sane route, however TINA applies - There Is No Alternative.
The Beggary Bumps has several other steep scree gully descents. They are mostly too steep to support cairns. And the ascents are usually steep steps requiring hauling on branches and scrub to gain the next step. There are many of these 50-100m ascents and descents throughout the trip, but especially on the Bumps.
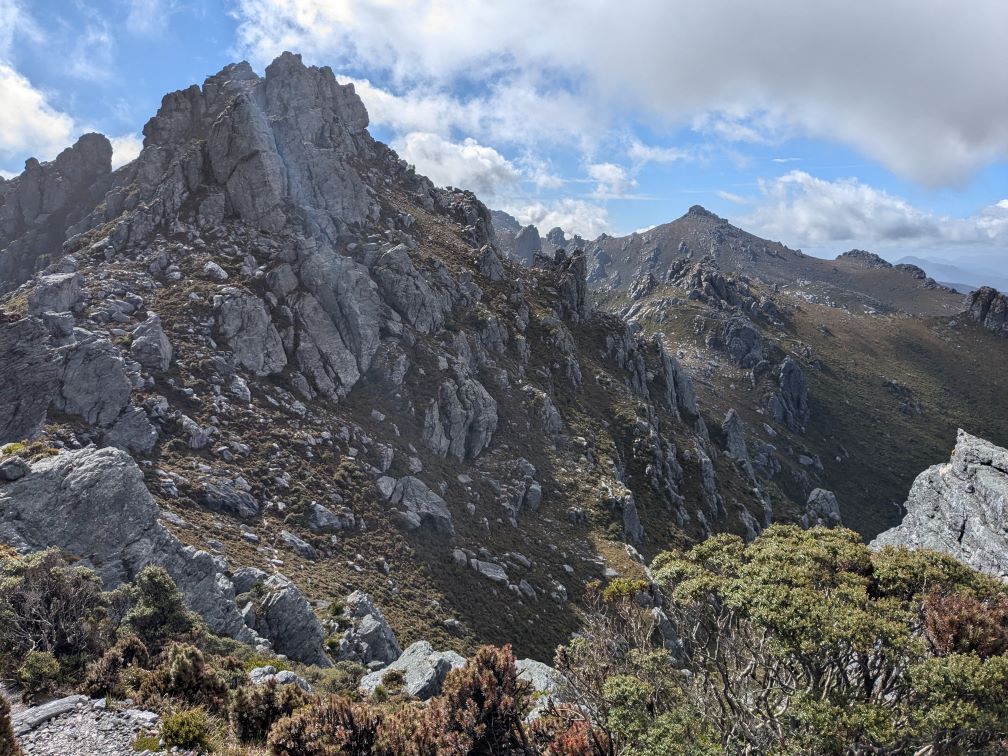
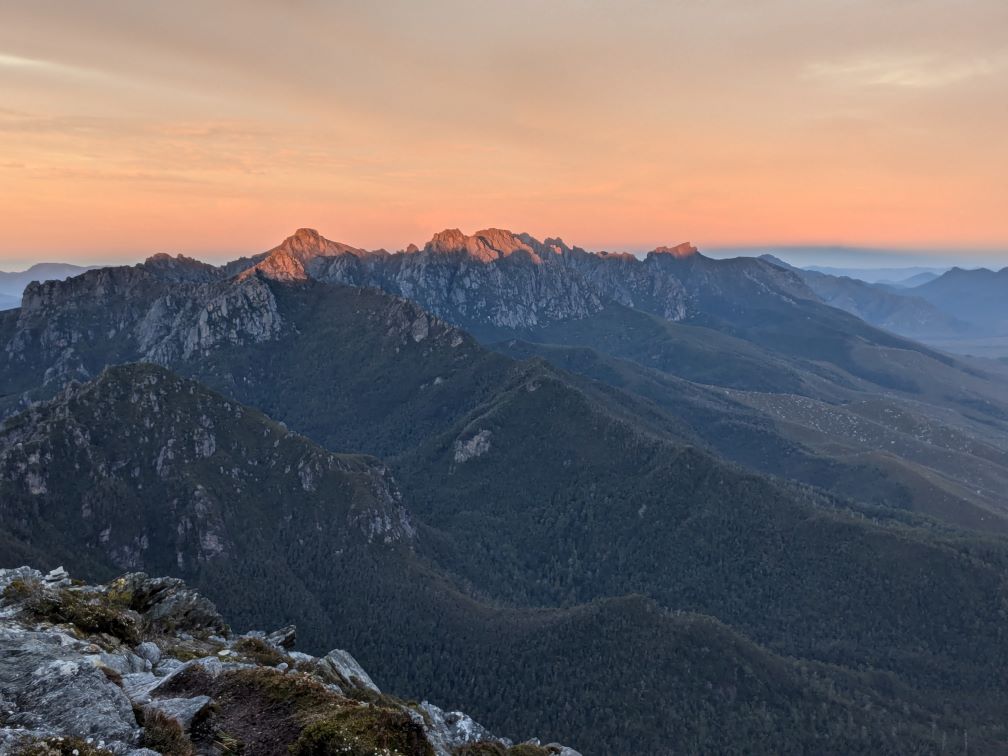
Looking back across the range traversed so far from the slopes of Mt Taurus.
It’s clear from this shot that there is zero scope for running or even achieving a normal walking pace for 90% of the 20km range.
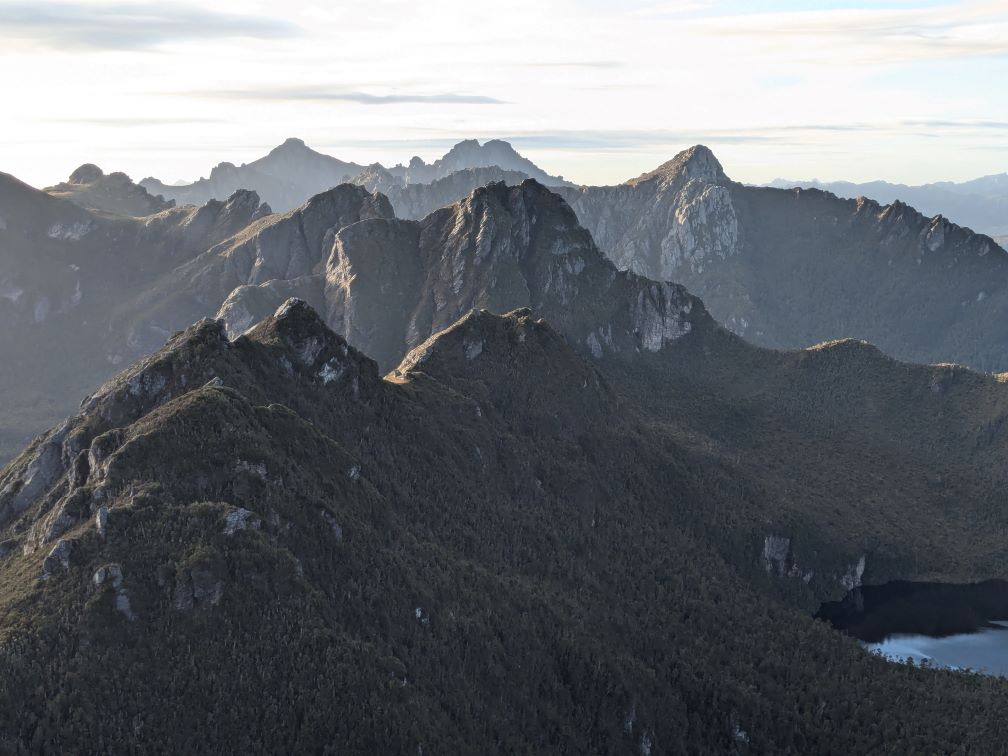
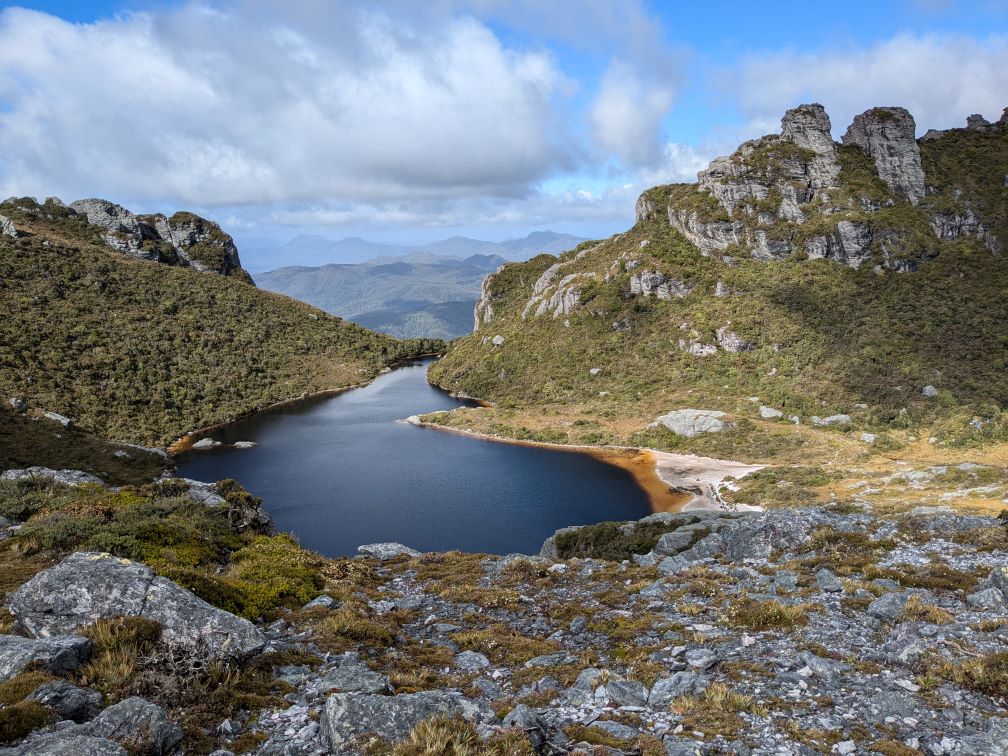
As sunset approached the track continued over blank slabs towards Mount Taurus. Federation Peak (the true end of the Western Arthurs) is the tiny but prominent pimple on the horizon.

The descent from Mt Taurus was predictably precipitous. Then the last 500m down to Haven Lake was relatively level. And after a brief stop to collect water from the Lake and chat to the two parties camped there it was up the hill to the ridgeline to skirt the next minor peak to the East.
Sunset came and went and walking with a headtorch it got harder to follow the cairns and track. While descending the 2nd peak after Mount Taurus the trail went right to a blank wall, the GPX track was an unhelpful straight line and the headtorch showed only a scree slope below the 2m wet chimney. After reversing to try up and across again, the only option was to ensure that the climbdown could be ascended and do it anyway - TINA. A further 15m down a tiny cairn became into view and the remainder of the descent to Lake Sirona was merely tricky.
I considered it too risky to continue using only a headtorch - my legs didn’t argue. The light breeze indicated that a bit of shelter would be required for a comfortable sleep. Carrying only a sleeping bag and emergency bivvy, it wasn’t too hard to find a small level softish bit of dirt and grass in the lee of a low rock. The trip had been planned around good weather, the stars were bright and sunrise eventually arrived.
Day 2
Breaking camp at 5AM took less than 10 mins including a quick breakfast. My legs warmed up very quickly with the next brief section of easy going stepping stones. Trackbuilders had laid slabs across this levelish bit of ridge before the next up. Mount Scorpio (1106m) while steep was probably the most straightforward peak to traverse. It was also the last point of 4G coverage.
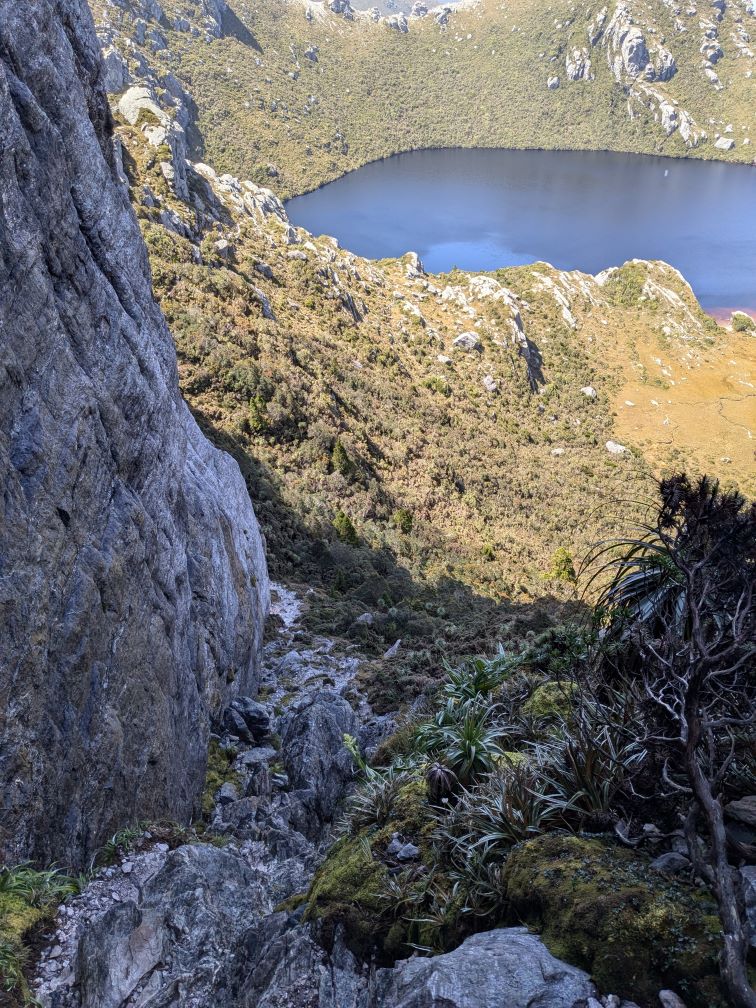
Passing the turnoff and registration book to the remainder of the Western Arthurs and Federation Peak, finding the track down Morraine K was easy to around the 560m contour. This is where the lower sections of the Shortcut Track are visible from the ridge. The start of the track down the side of the morraine is not visible, but it’s not especially steep or rough and aiming for the visible sections a easy.
The official route is via the campsite on Seven Mile Creek at the base of Morraine K - the shortcut avoids that extra 4km as well as 100m vert.
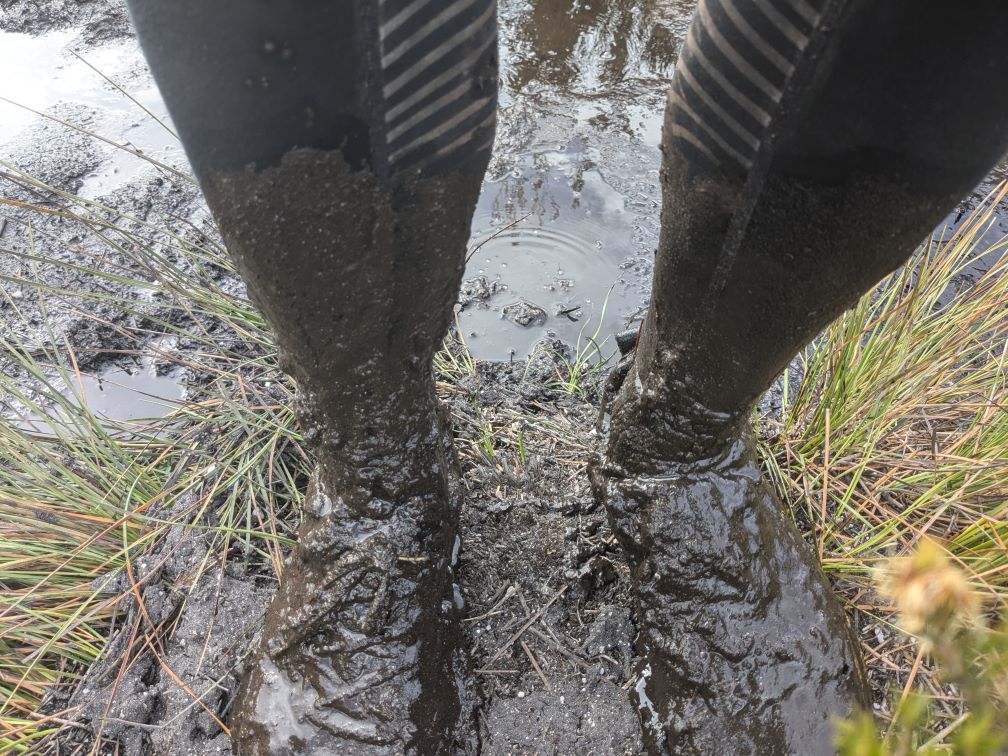
The plains were dissected by occasional densely vegetated creeks, but otherwise were mostly flat. However, the downside of flat is boggy, consequently my trail runners doubled in weight. And there were dozens of mandatory bogs. My ankle gaiters had long since proven to be no match for them.
The mud inside my socks was impossible to scrub off - my feet only returned to a normal colour after shedding a couple of layers of skin.
Finding the way through some of the dense creek vegetation was often tricky - care must be taken to not cross the river twice and find a good track leading up and out… and back the way you came!
Reaching Junction Camp for the 2nd time in 24 hours with the knowledge that it would be only another 9km to go, also came the knowledge that there was a further 50 bogs to endure.
Stats
I left the car park at 4:45AM and walked continuously for 17:26 hours to Lake Sirona to arrive at 10:10PM. Next morning I left at 5:00AM and was back at the car park by 12:20 - 7:20 hours later.
Total of 24:56 hours of moving and 6:45 hours of sleep.
- Day 1 - 32.6km - 2993m of ascent
- Day 2 - 22.5km - 621m of ascent
Care
There is very occasional 4G coverage from a few of the peaks - both Optus & Telstra… but keep expectations low.
Route
As Tasmanian Parks mentions this is a Highly Advanced undertaking that is expected to take 6 or 7 days.
They should be taken seriously, there are at least 40 very steep ascents and descents, some precipitous. There are a couple of exposed slabs climbs with little in the way of holds. Navigation can be tricky with some sections only lightly cairned. And of course the weather is highly variable. Water is scarce between Mt Pegasus and Lake Sirona, except for the campsites at the lakes - even after rain. Some of the 6-7 recommended days cover only 4km - this is an indication of the terrain, expect 1.5-2 hours per kilometer!
Once past Mount Pegasus it is 100% committing. Turning back would be harder than continuing as the descent of the two climbs would be harder than their ascent.
Gear
I wore lycra leggings for protection from the mostly lightish scrub, the mud, flies and sun, a long sleeved thermal top and ankle gaiters. The gaiters proved to be only of little help with the bogs - they came loose too often.
I wore my water/windproof approaching Mt Hesperus as the wind had a chill to it, and also after dark from Mt Taurus, otherwise the temperature was good.
I took a 125g walking pole which was invaluable on the downs. A pole is pretty essential - useful for gauging depths of bogs, but mandatory as an extra support when descending the bigger drops and balancing on loose terrain.
I took a lightweight sleeping bag and bivvy and a spare top layer - total base weight was less than 2kg.
Water
There is water available at the lakes, but they often entail a significant detour. After rain there are some seepages and trickles over rocks in various places. Mt Pegasus to Lake Sirona is particularly lacking in surface water - fill up at the lakes by the campsites. I took a 500ml flask and was occasionally a little thirsty in this section. I squeezed dribbles out of the moss, channelled drips off rocks and also skimmed the shallow but mostly clear puddles with no ill effects.
Weather
I planned the trip around a 2 day weather window with temps between 8C and 14C dropping only a little overnight. The breeze was occasionally up to 20-30kmh. The 2nd day was clear resulting in a little sunburn walking West across the plains.
Food
I carried 3 x 90g of gels, and brought one back. A tube of crackers and cheese - less than half eaten. A block of chocolate - only a couple of squares eaten. A packet of wheatmeal biscuits - less than half eaten. This is clearly insufficient. Strava says I expended 8,000 calories.
Conclusion
There’s a lot of Type 2 fun and even a touch of Type 3 book-ending the Type I fun. It’s a challenging effort regardless of whether you take one day or one week to complete it. The isolation and views forever are unparalleled. Once on the ridge the relentless up and down is soul sapping.
The boggy sections on the plains can feel monotonous at times. However, that is the price you pay for the privilege of experiencing one of Australia’s most demanding bushwalks.